Difference between revisions of "Rooftop Dish Antenna Mount"
Jump to navigation
Jump to search
| Line 29: | Line 29: | ||
== Diagrams == | == Diagrams == | ||
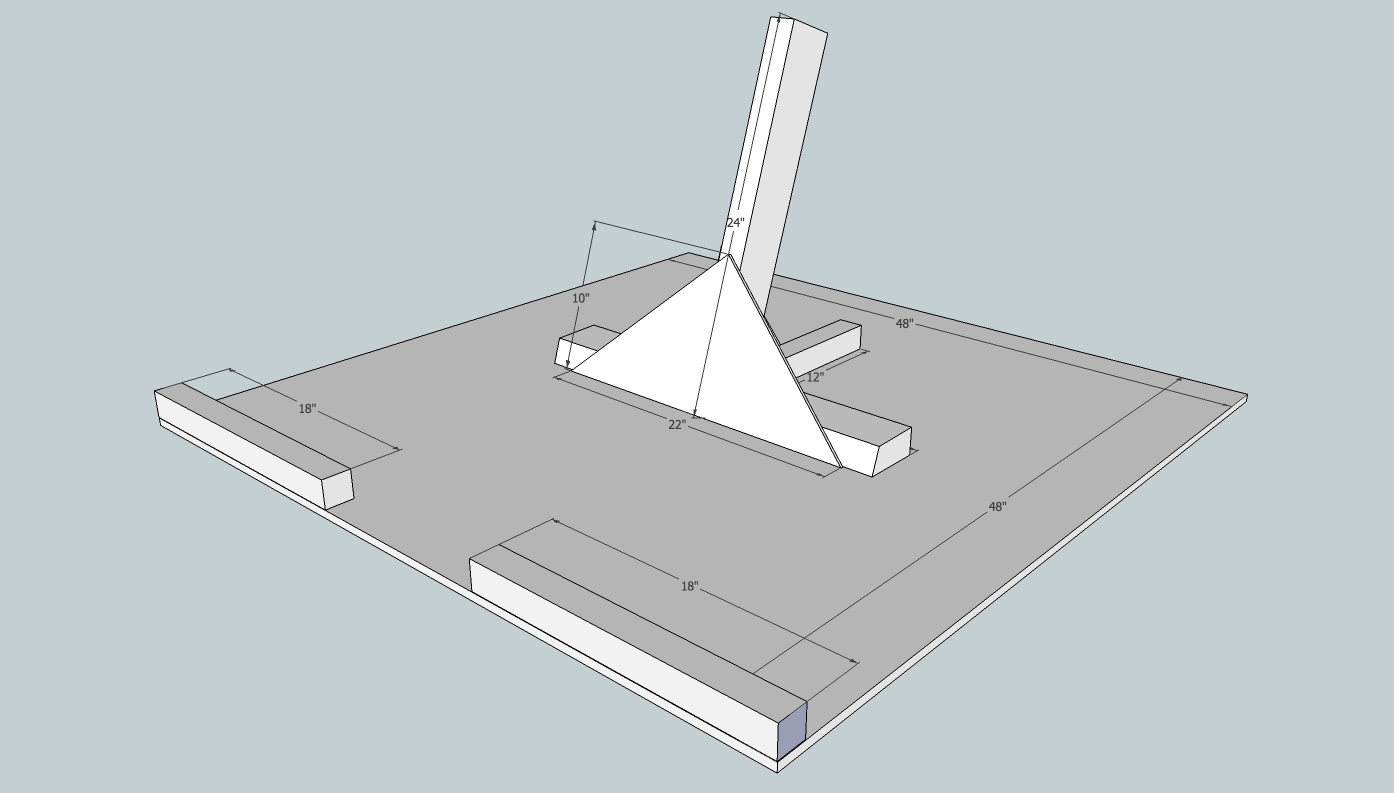
[[File:Roof-platform1-2-1.jpg|thumb| left | 600px | | [[File:Roof-platform1-2-1.jpg|thumb| left | 600px |Sloped-roof mounting platform for a dish antenna. Back view.]] | ||
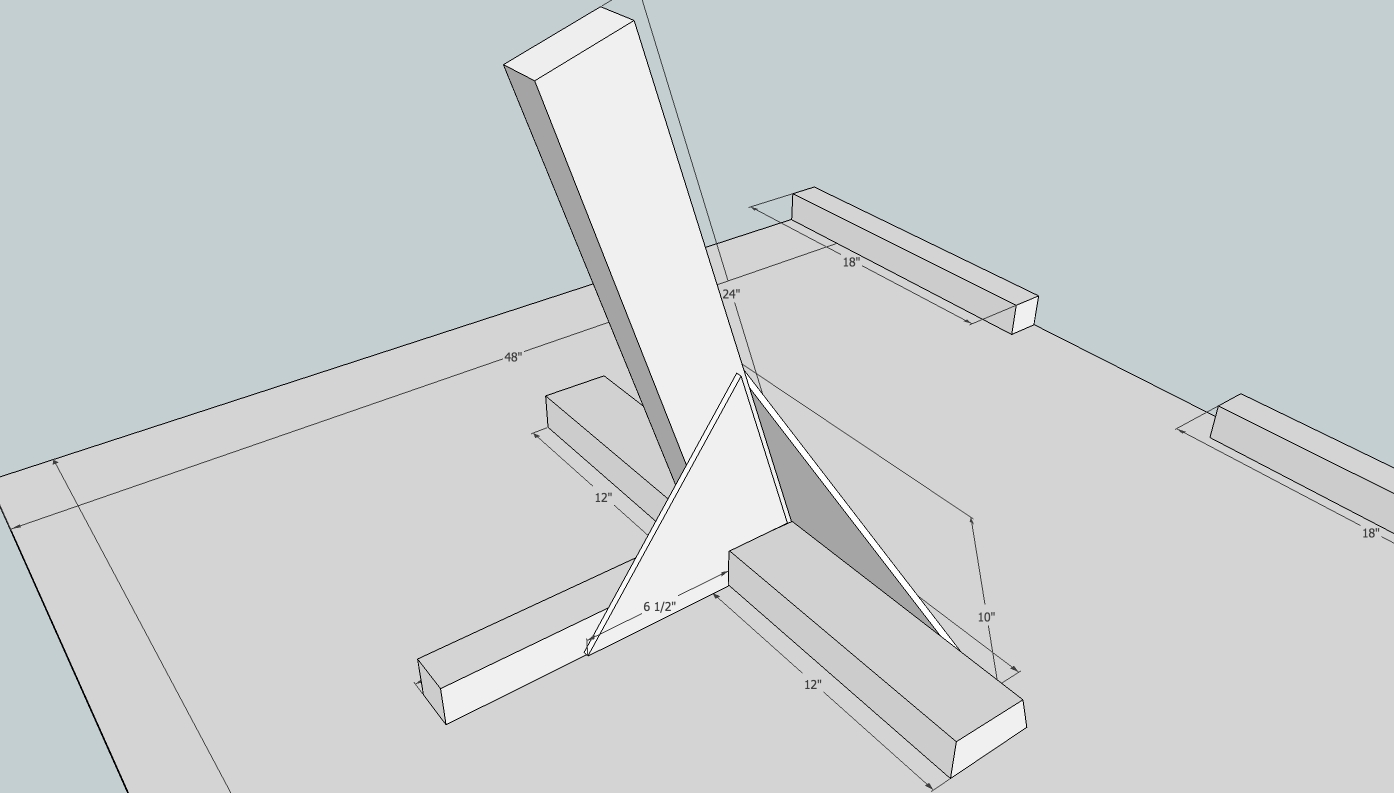
[[File:Roof-platform1-2-2.jpg|thumb| left | | [[File:Roof-platform1-2-2.jpg|thumb| left | 600px |Sloped-roof mounting platform for a dish antenna. Front view.]] | ||
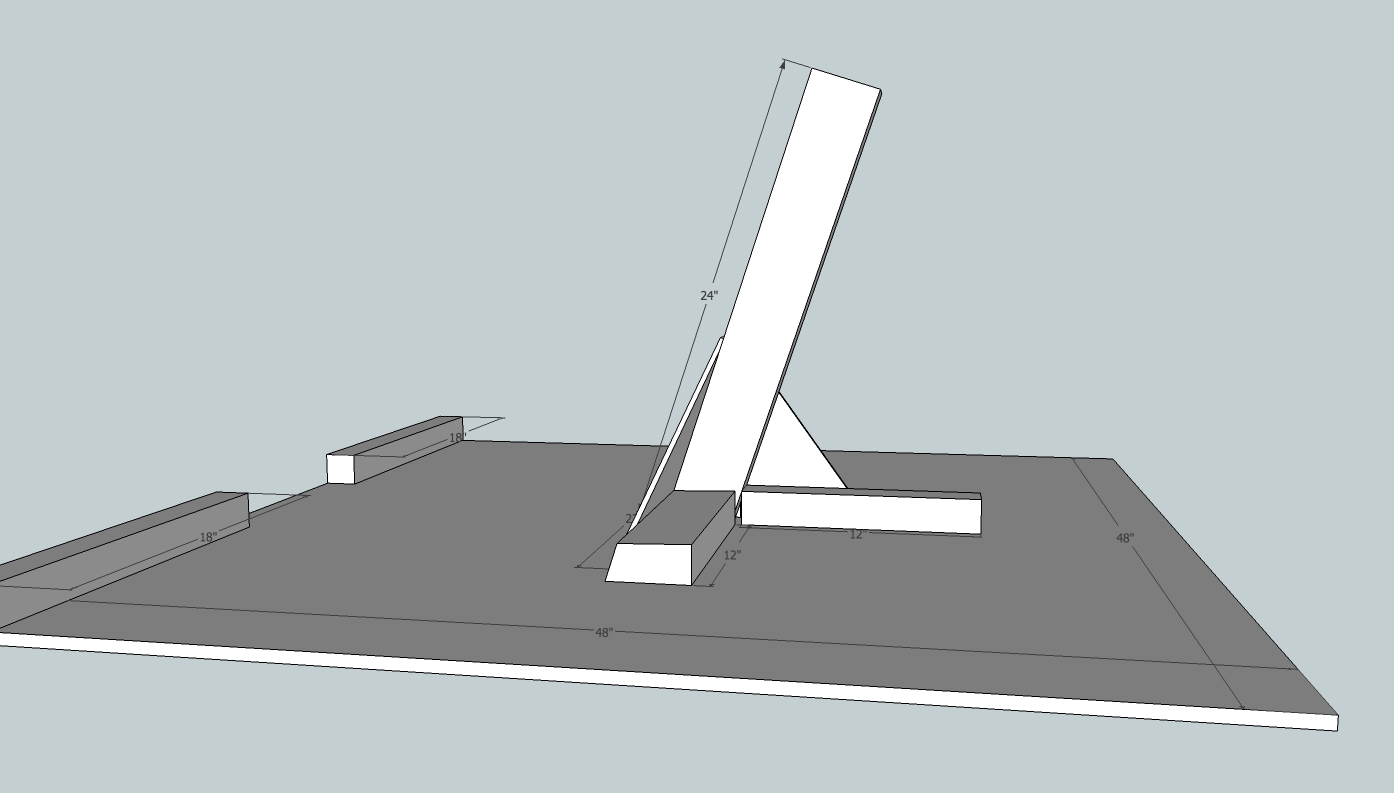
[[File:Roof-platform1-2-3.jpg|thumb| left | | [[File:Roof-platform1-2-3.jpg|thumb| left | 600px |Sloped-roof mounting platform for a dish antenna. Side view.]] | ||
Revision as of 22:36, 22 November 2014
See Also:
notes about how to mount a dish antenna on a basic sloped roof house.
Overview
The basic concept for this mounting is to provide a sturdy stand with minimum impact on the roof. There is an attic air vent near the peak of the roof around which it will be possible to hang the assembly. A braided steel wire about 20' long should be sufficient.
The design uses a 4x4 piece of 1/2" plywood with a 2' 2x4 standing straight up and braced with 1/4" plywood triangles. The roof has an average slope at about 18 degrees so there are 3 cuts that must be made at that angle.
See the diagrams below.
Parts
- 1 x 2x4 board x 4'
- 1 x 2x2 board x 4'
- 1 x 4'x4' 1/2" plywood
- 16 x #10 x 1.5" wood screw, philips bevel head
- 20 x #10 x 2.0" wood screw, philips bevel head
- 20' braded cable
- 2 x wire rope clamp w/ thimble
- 1 x 24" x 2' conduit
- 2 x 2"x4" U-bolts
- wood glue
- Paint and/or water sealer to apply to the wood.


