Difference between revisions of "3DPrinting"
Jump to navigation
Jump to search
| Line 5: | Line 5: | ||
We currently have the following 3D printers: | We currently have the following 3D printers: | ||
*[[O:5|Type A machines Series 1]] | *[[O:5|Type A machines Series 1]] | ||
= Documentation = | = Documentation = | ||
Revision as of 18:13, 7 May 2013
Hardware
We currently have the following 3D printers:
Documentation
Status
Status: Slowly piecing together documentation so that new people can get going. There are several key insruction pieces, but there is nothing that starts from the beginning and takes you to the end of turning on the 3D Printing desktop, clicking on the right software, calibrating the printer, and debugging. The status now is incomplete!
Overview
There are several steps in the 3D Printing process.
- Hooking up the 3D Printer to a desktop or laptop computer. Unclear, needs to be written down
- 3D Modelling + 3D Printed Model Software (Google Sketchup, etc) - What we cover in our Today I Learned Workshops
- Repetier-Host - open-source driver software connecting our computer with the 3D Printer
- Printer Calibration (see comics) Only place where we have any documentation
- Act of Printing
- Caring of 3D Printed Objects + More How we remove the 3D Printed object from the printer bed, decorating the 3D Printed object, etc.
Printer Calibration
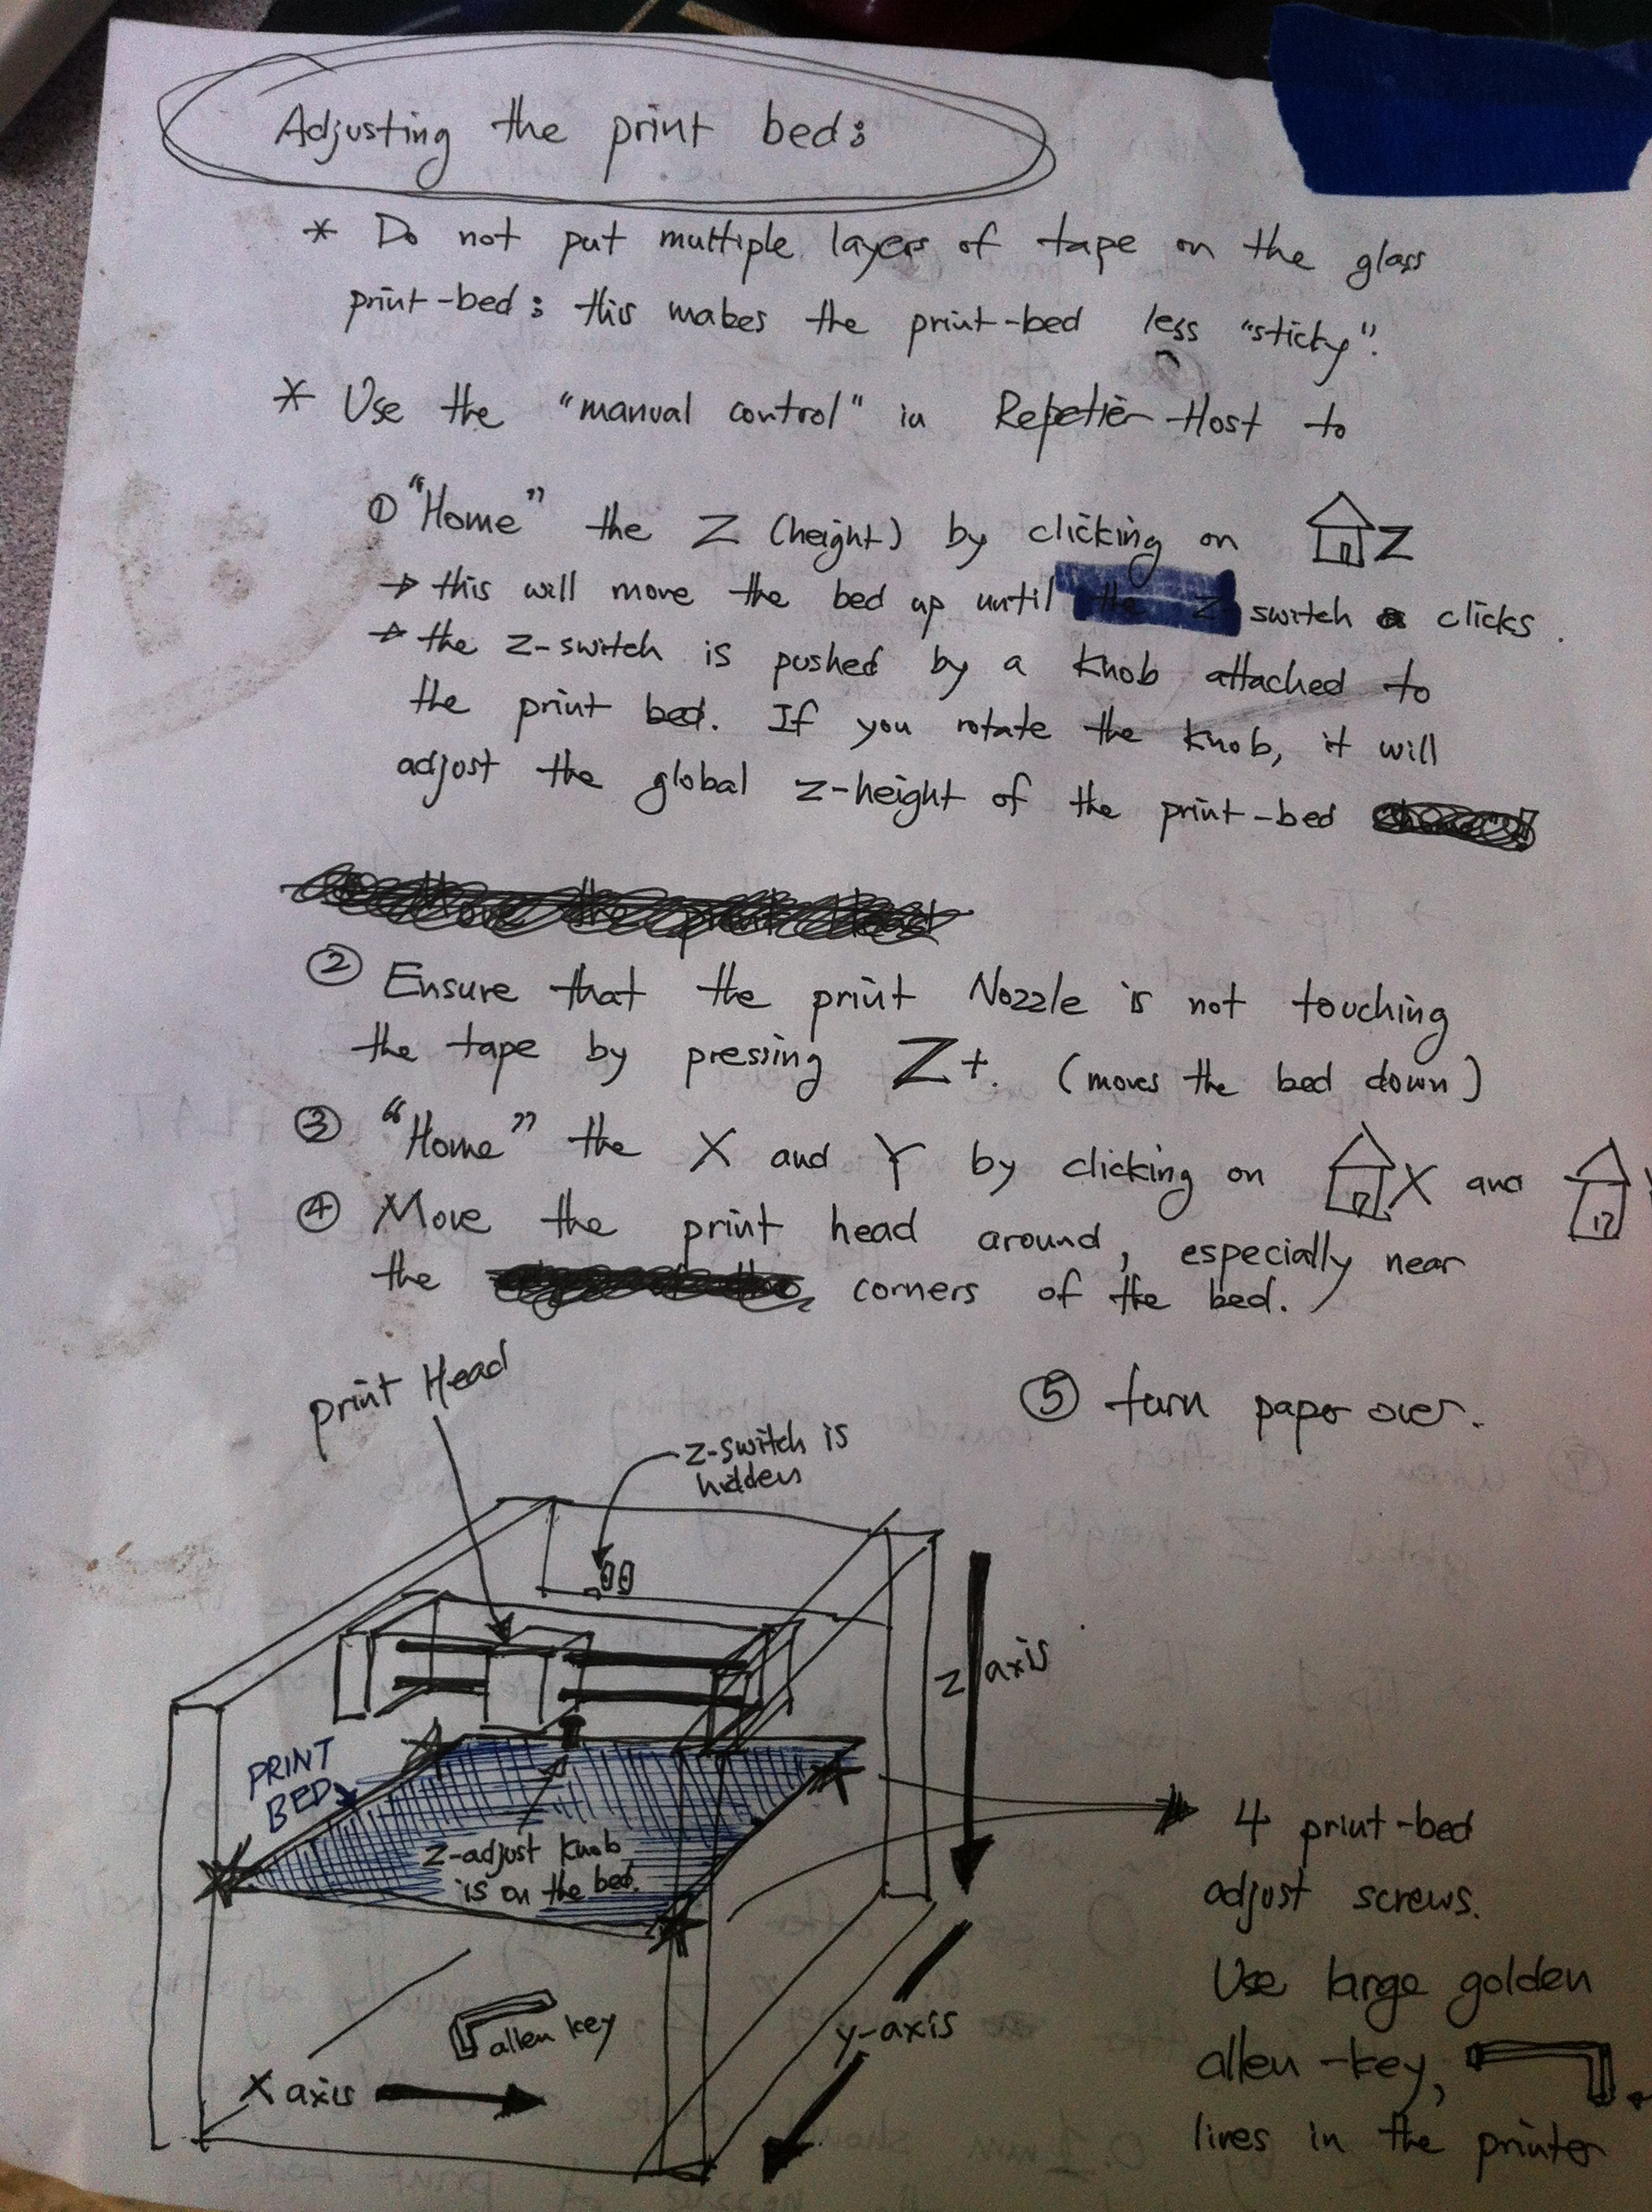
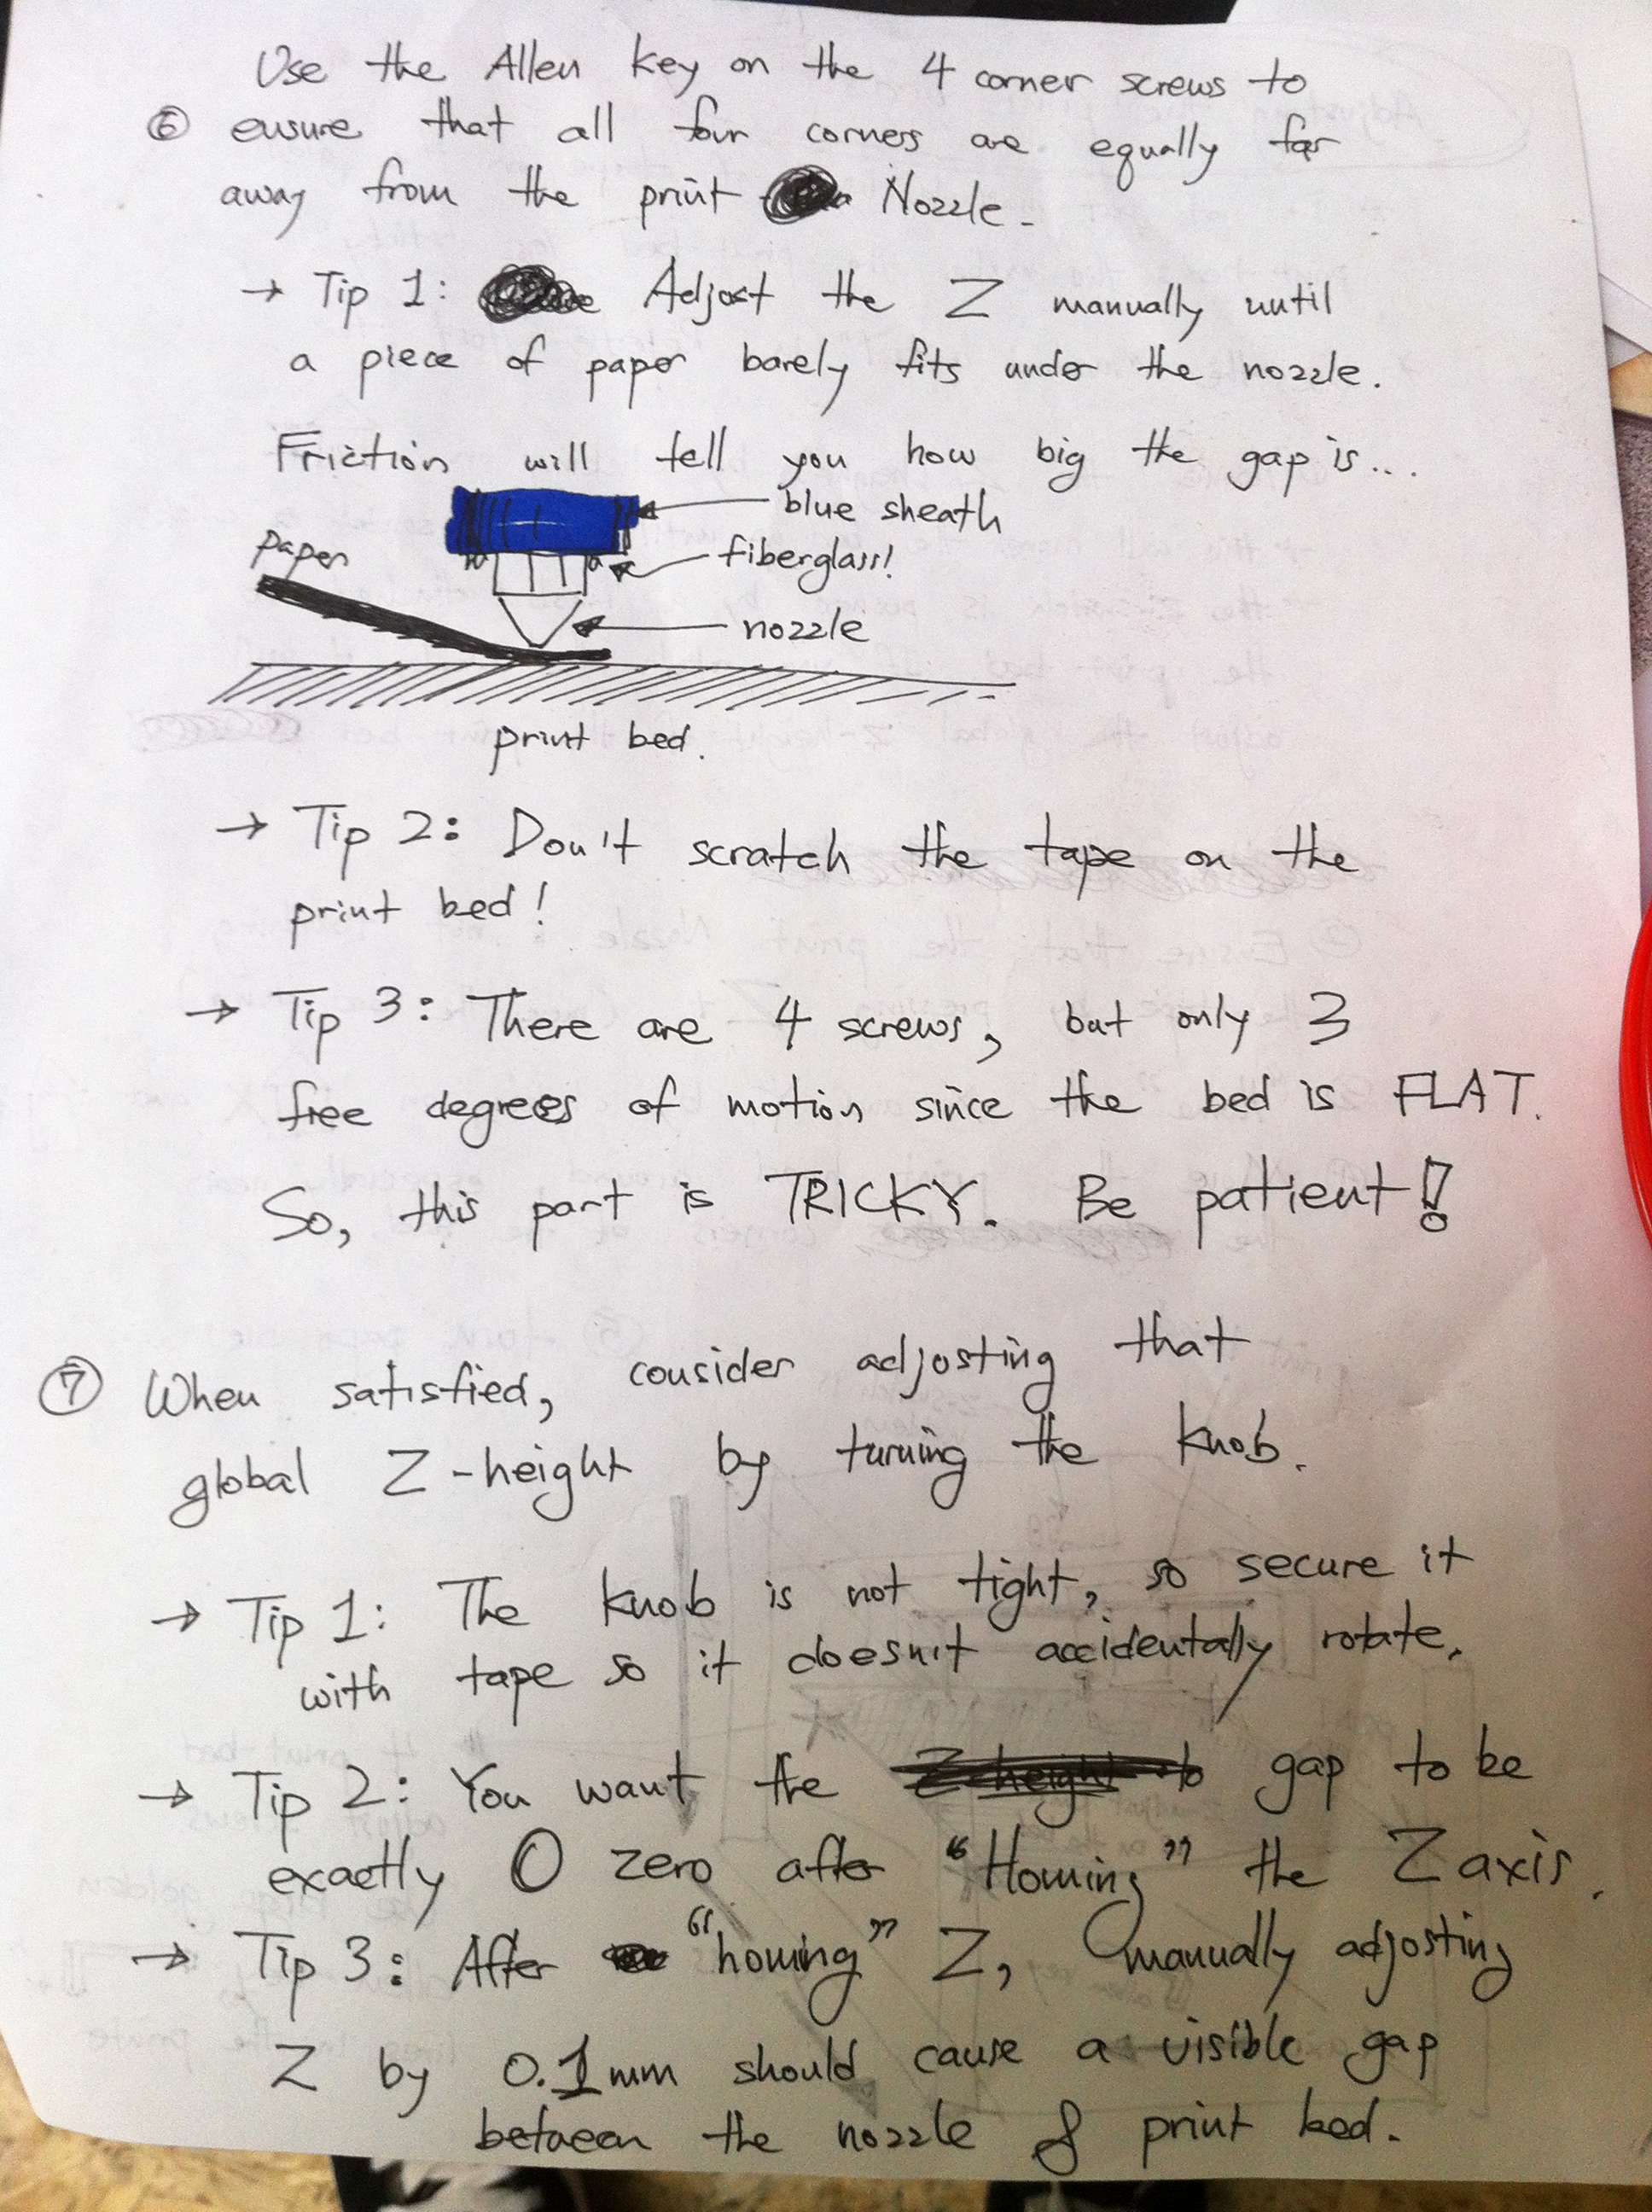
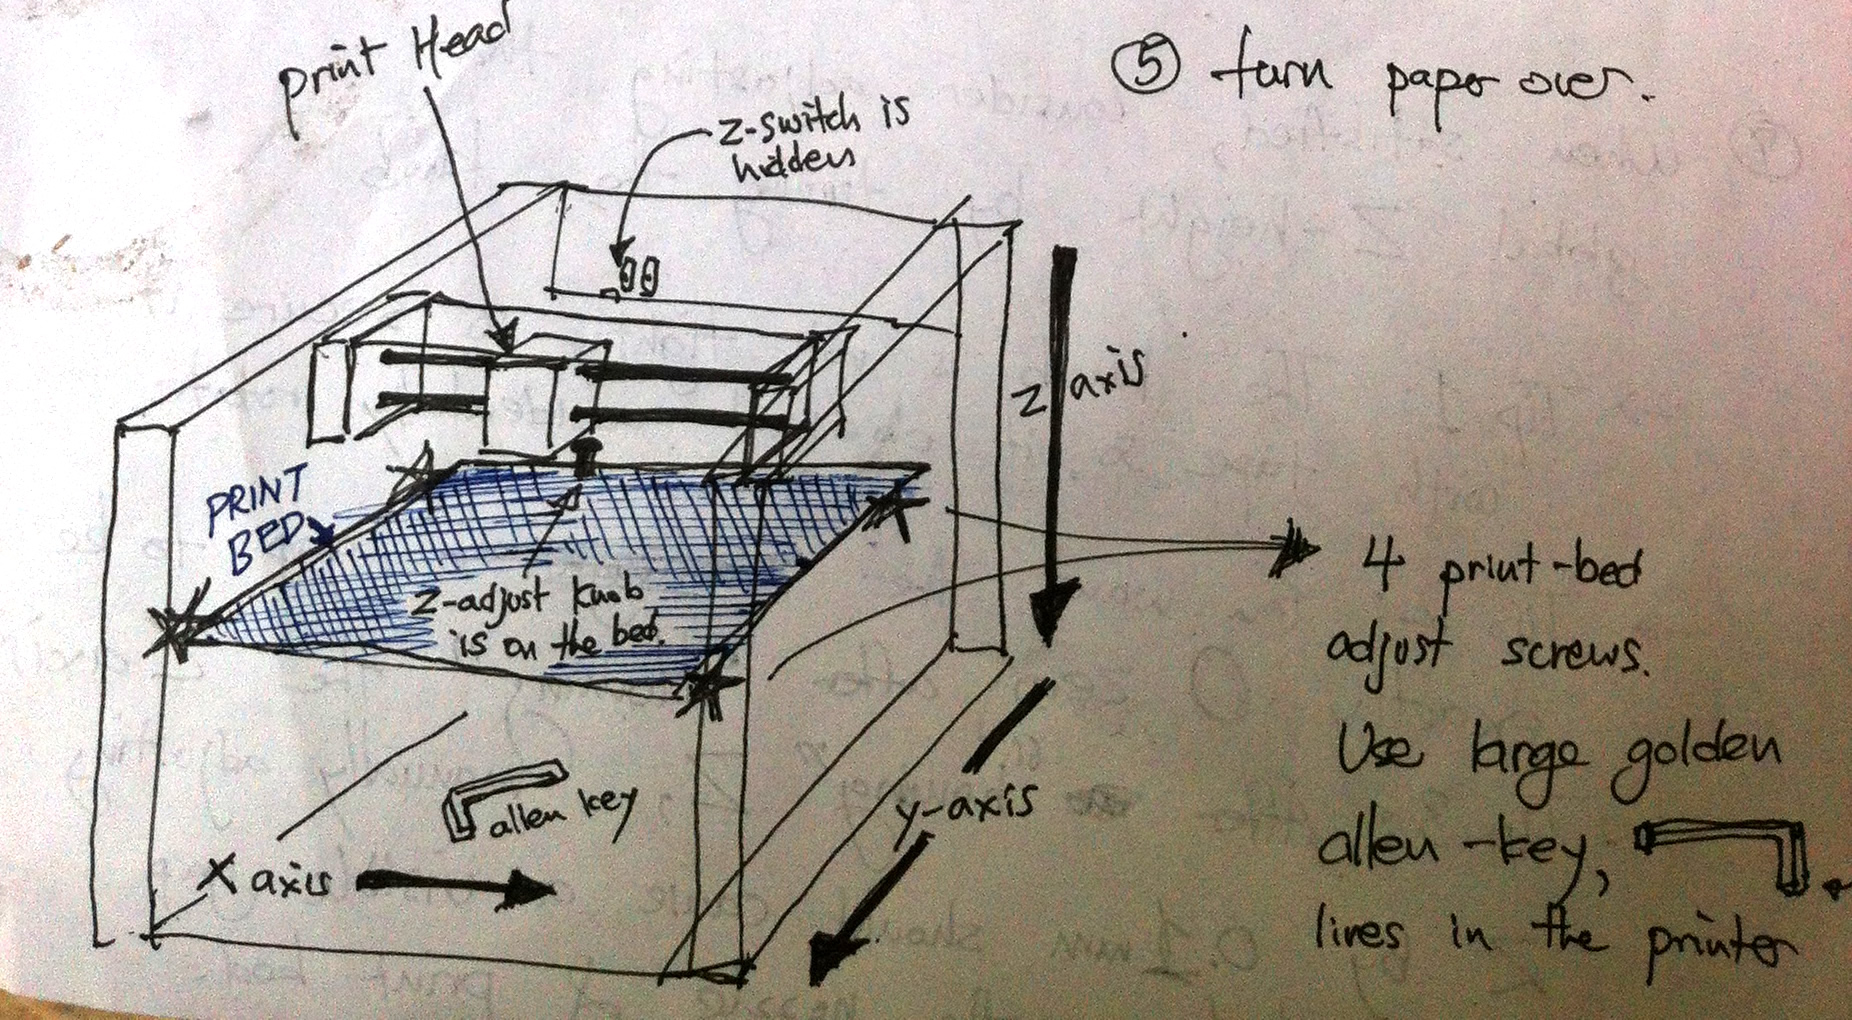
Background: Original handwritten piece by Jae. This was the primary documentation for most of the early SudoRoom days and was writen down on a piece of paper. It's quite excellent.
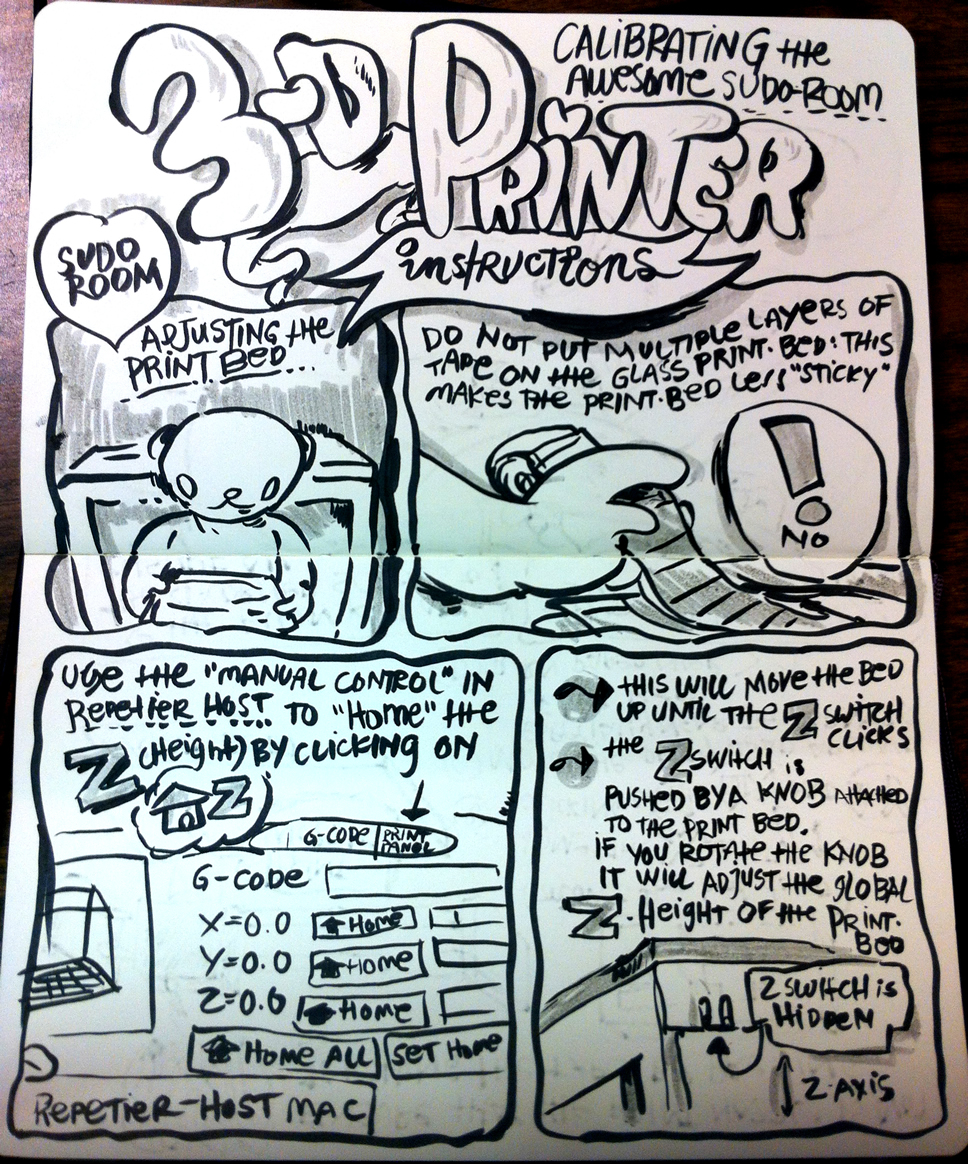
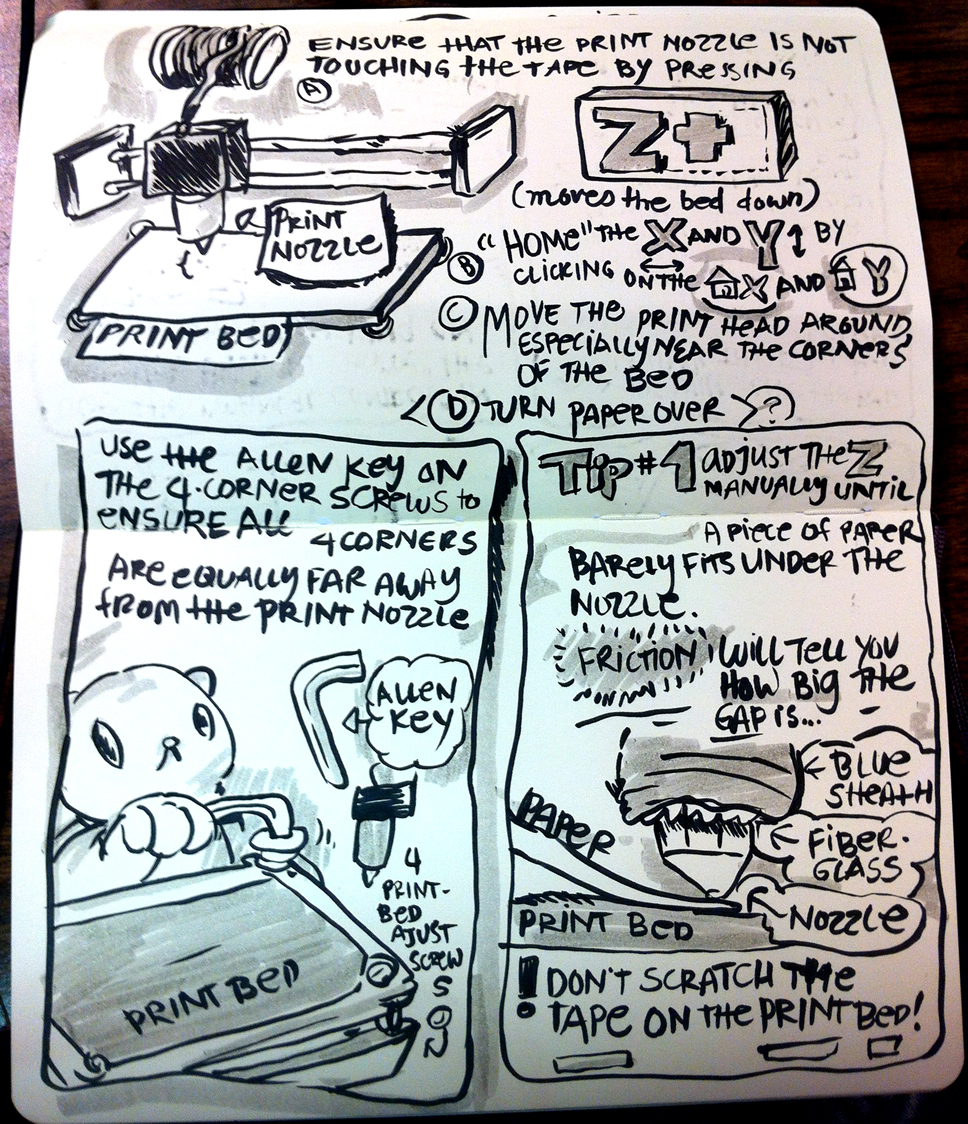
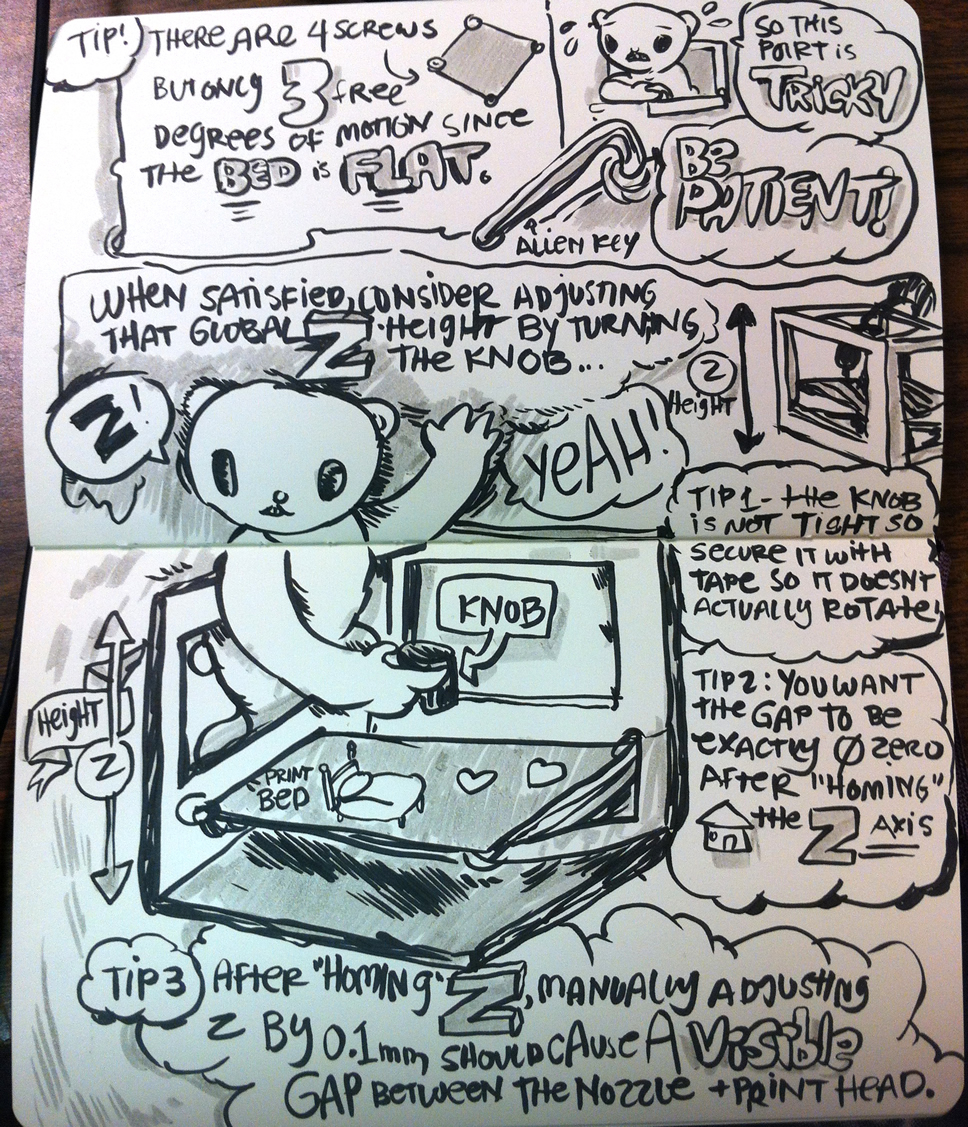
Printer Calibration: Comics
A comic book interpretation of the Printer Calibration instructions from Jae.
