Type A Machine
3D printer
Made by http://typeamachines.com/ in San Francisco
Anyone can use it, just come by and get a quick tutorial. There are a few instruction notes on the printer's table.
Documentation
For End to End 3D Printing instructions see the Documentation section of 3DPrinting
Getting Started
3D Models
Any .stl file can be printed out by the printer. A good place to find .stl files is Thingiverse.
If you haven't done 3D modeling before then give something easy a try like Tinkercad (in Google Chrome) or Google sketchup (installed on computer adjacent to printer). Sketchup can now directly import .stl files thanks to this plugin. Also consider Blender (installed on computer adjacent to printer) for modeling, although it is primarily a software for animation it apparently is good for regular modeling as well.
Earlier Instructions
Using the printer
To calibrate the bed, see instructions on the 3DPrinting page.
This is a transcription of the note in front of the printer:
- Make sure the blue tape is flat and covers the glass base (formerly acrylic).
- Prepare an .stl file (see O:5#3D Models above).
- Open the program Repetier (on the Desktop).
- Turn machine on (switch on back, right-hand-side).
- Connect by clicking at the top left "connect" (power symbol) in Repetier.
- Add objects to the field by selecting "Add Object" on the lower right-hand-side of Repetier.
- Select the Slic3r tab on the right-hand tabbed menu, then select "Slice with Slic3r".
- When slicing is done, hit "run" (play symbol).
- When your object(s) is(are) done printing, turn off the printer and put the computer to sleep (or standby).
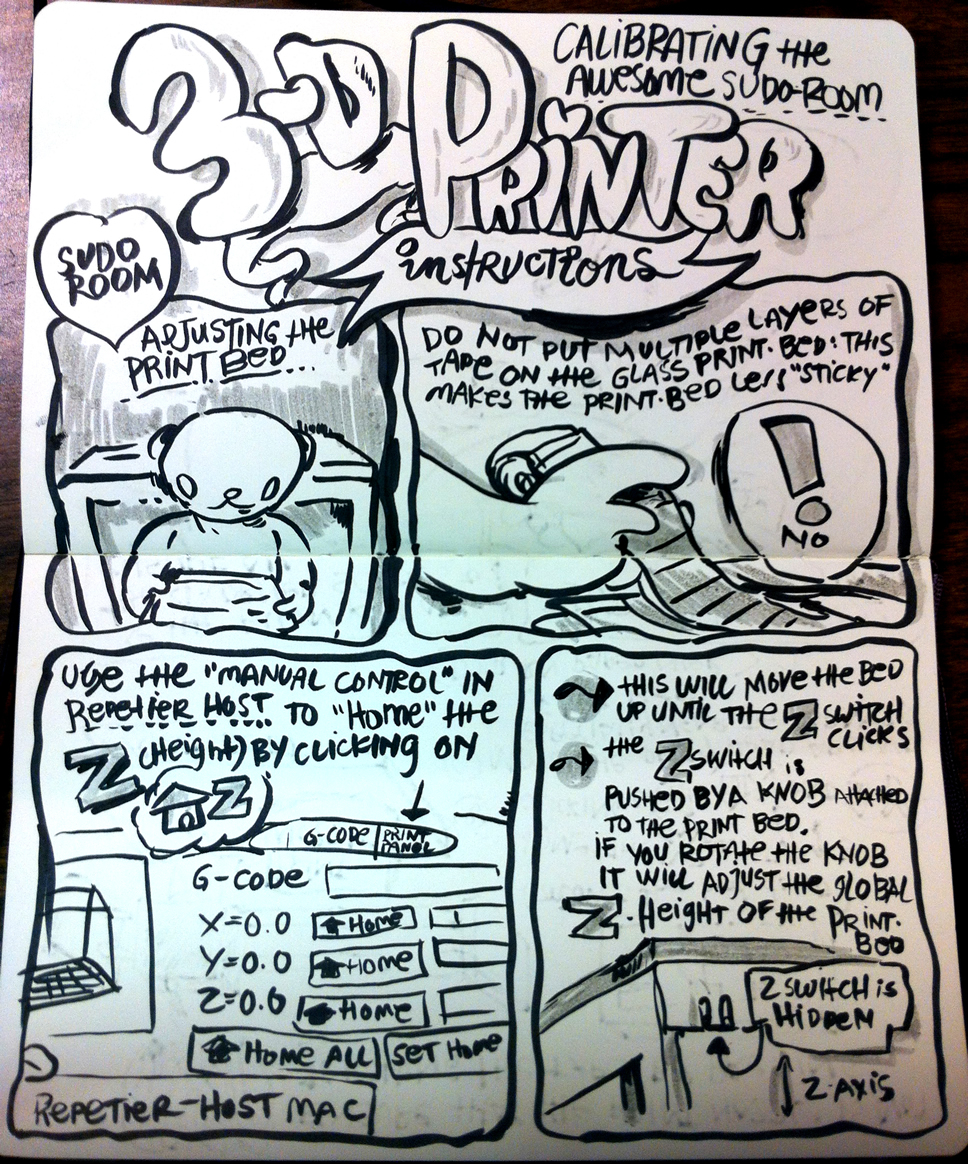
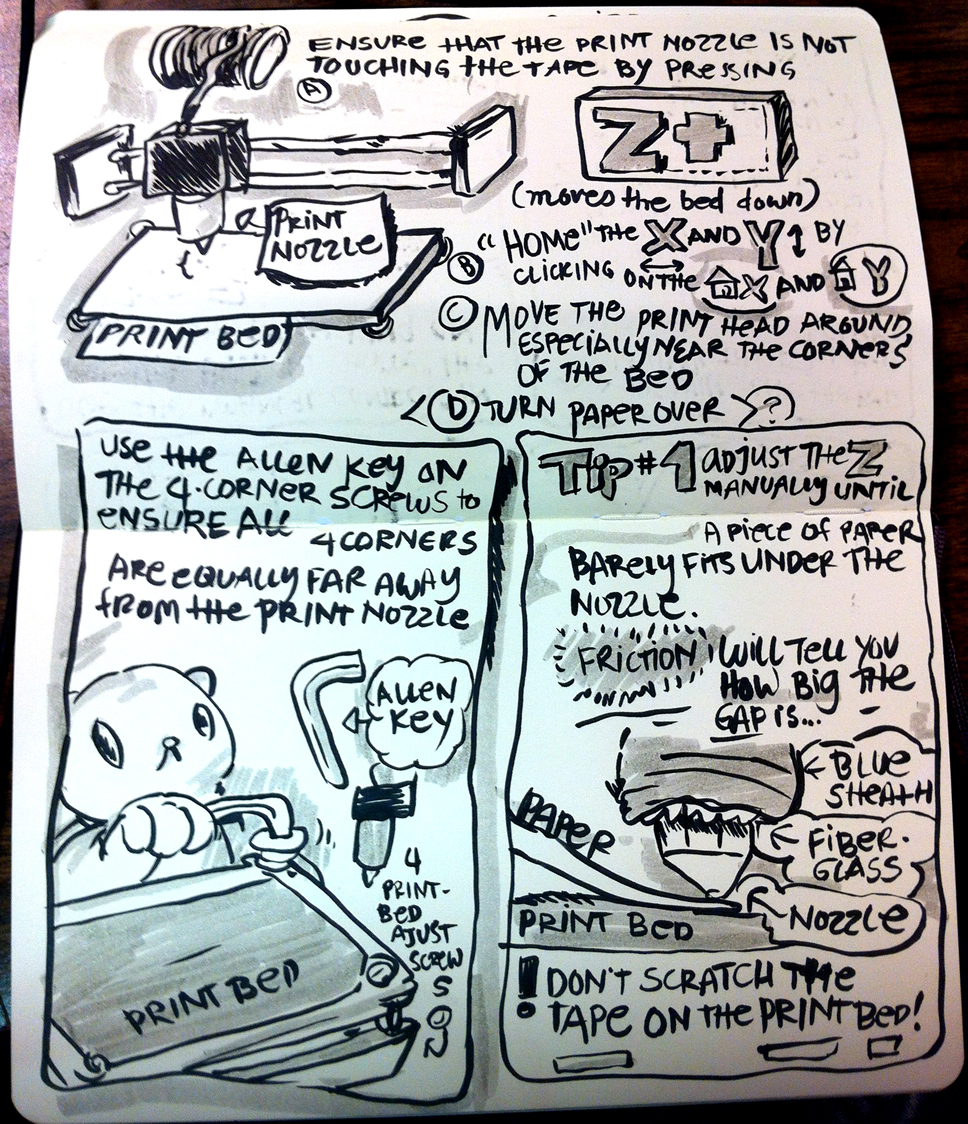
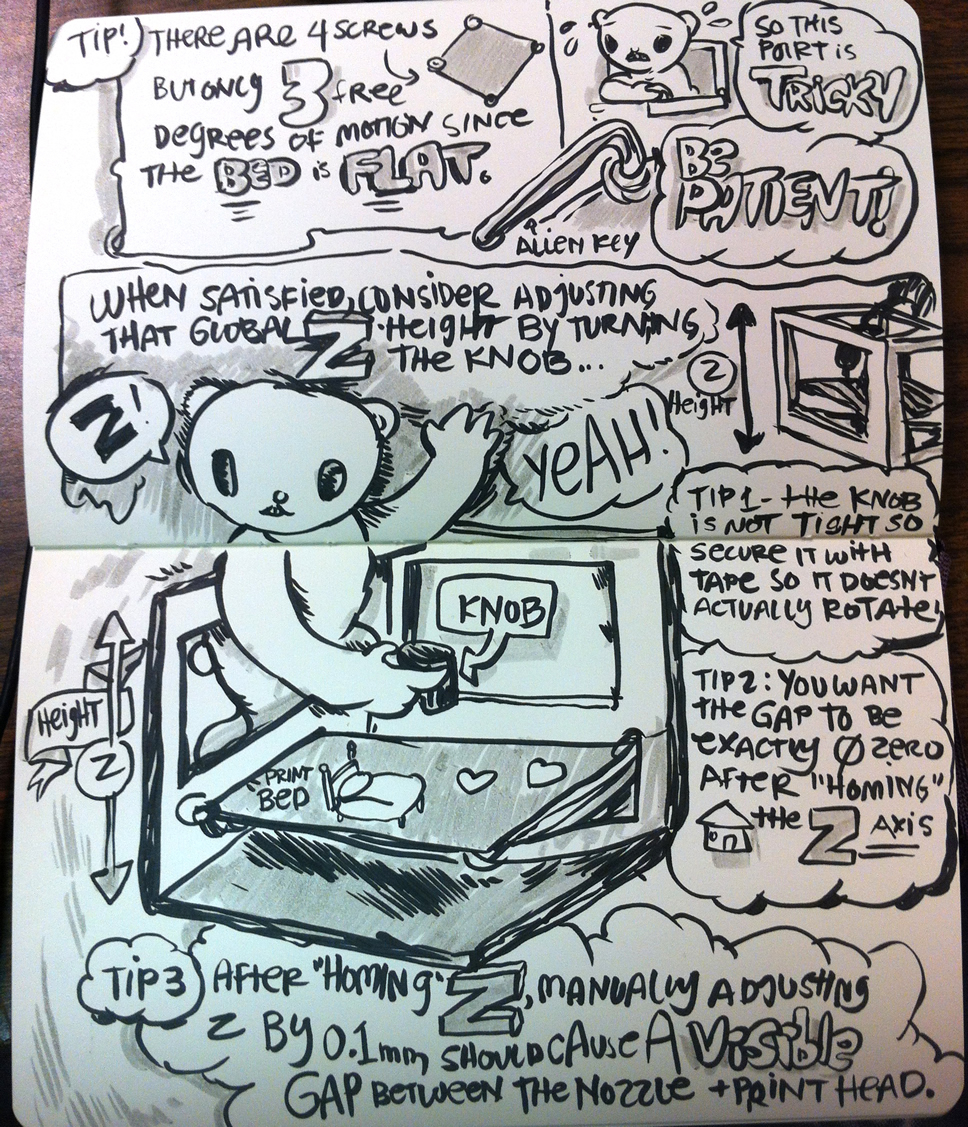
Printer Calibration: Comics
A comic book interpretation of the Printer Calibration instructions from Jae. Warning: this is out of date as of March 2013
Leveling the print plate using an allen wrench as a guide
Lay the allen wrench flat on one corner of the plate.
With the machine off, drag the printer head over the long part of the wrench. The head should just barely flip the wrench up. Adjust the height of the corner with the thumbwheels. Make sure the plate ends up tight between the wheels.
Repeat for the other three corners.


